Making homemade bread without a bread maker is far easier than most people think. You don’t need a stand mixer, a Dutch oven, or any special kit: just a bowl, an oven, and a bit of patience while the yeast does its thing.
This is the no-knead method I give to everyone who says they can’t bake bread. You stir everything together in about five minutes, leave it alone, shape it roughly, and bake. The result is a proper crusty loaf that puts most supermarket bread to shame.
Homemade Bread Without A Bread Maker: The Method That Actually Works
Here’s how I do it, in order. Nothing fancy here, just the steps that actually move the needle.
Mix four ingredients, that’s it
Combine 500g of strong white bread flour, 7g of fast-action dried yeast (one sachet), 10g of salt (two teaspoons) and 350ml of lukewarm water in a big bowl. Stir with a wooden spoon until it comes together into a shaggy, sticky dough. No kneading required at all: time does the work that kneading normally does.
If you take one thing from this section, make it this: the details compound.
Let time do the kneading
Cover the bowl with a damp tea towel or cling film and leave it somewhere draught-free for 2 to 3 hours, until roughly doubled in size. During this slow rise, the gluten develops by itself and the flavour deepens far beyond what a quick knead-and-bake loaf can manage. If your kitchen is cool, give it longer rather than moving it somewhere hot.
There’s no shortcut around this one, but honestly, it’s the satisfying part anyway.
For more ideas along these lines, have a look at bake sourdough bread for beginners.
Shape it simply
Tip the risen dough onto a floured surface and fold the edges into the middle a few times to form a rough ball or oval. Don’t punch it down aggressively: you want to keep most of the air. Place it seam-side down on a floured baking tray or into a floured proving basket if you have one.
Do it properly the first time and you’ll never have to troubleshoot it later.
Prove for 30 to 45 minutes
Cover the shaped loaf loosely and leave it for a second, shorter rise. It’s ready when a gentle poke with a floured finger leaves an indent that springs back slowly. If it springs back instantly, give it longer; if it collapses, it’s over-proved, so get it in the oven immediately.
This might feel like extra effort now, but it saves time and disappointment down the line.
Bake hot with steam
Heat your oven to its maximum, around 240°C (220°C fan), with a baking tray on the bottom shelf. Slash the top of the loaf with a sharp knife, slide it in, and pour a cup of hot water into the bottom tray to create steam. The steam keeps the crust soft for the first few minutes so the loaf can expand fully, then it bakes into a deep, crackly crust.
The difference this makes is out of all proportion to the effort involved.
Cool properly before slicing
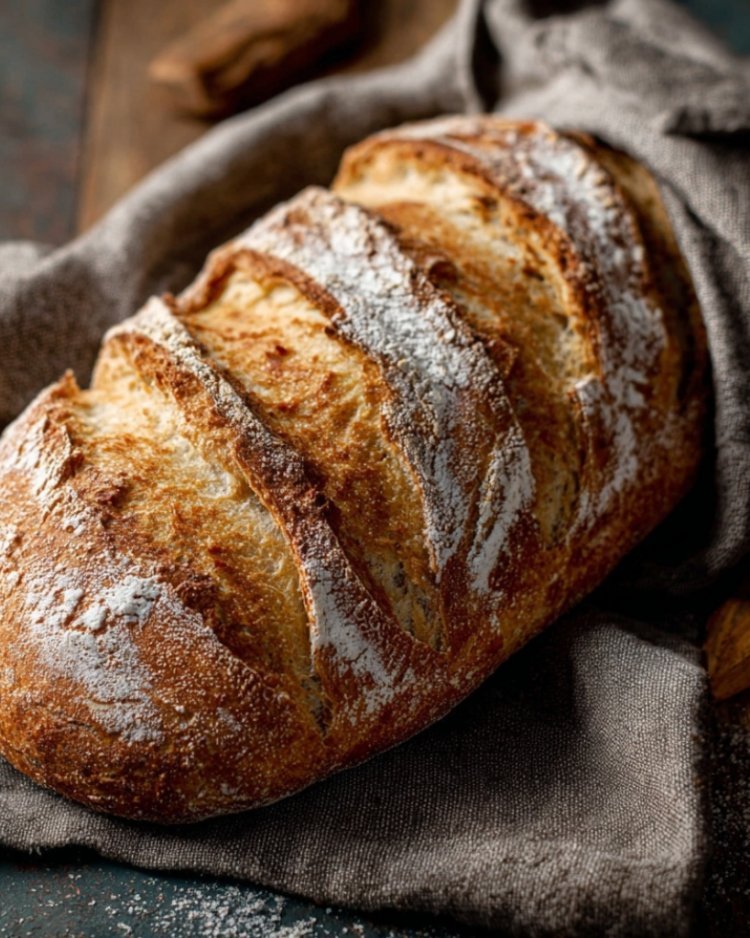
Bake for 25 to 30 minutes until deeply golden and hollow-sounding when tapped underneath. Then, and this is the hard part, leave it on a wire rack for at least 30 minutes. Cutting too early lets steam escape and gives you a gummy crumb. The crackling sound as it cools is one of life’s great pleasures.
Trust the process here even if it feels counterintuitive at first.
Where It Usually Goes Wrong
If something goes wrong, it’s almost always one of these. Worth a quick read before you start.
Killing the yeast with hot water
If the water’s too hot to hold your finger in comfortably, it’s too hot for yeast. Lukewarm is the word.
Underbaking through impatience
A pale loaf is an underbaked loaf. Go for a deep golden brown: colour equals flavour.
Slicing while hot
I know it’s tempting, but cutting early ruins the crumb texture. Wait the full 30 minutes.
Handy Tips Worth Knowing
Once you’ve got the basics down, these are the small habits that make everything easier next time round.
- Strong bread flour matters: its higher protein builds the gluten network. Plain flour gives a denser, cakier loaf. Obvious once you know it, easy to miss until then.
- Lukewarm water means comfortable to touch, not hot. Water that’s too hot kills the yeast outright. Small habit, big payoff.
- A £2 dough scraper from a kitchen shop makes handling sticky dough dramatically less annoying. You’ll thank yourself later.
- For a softer crust, brush the hot loaf with a little melted butter as soon as it comes out. It becomes second nature quickly.
- Stale homemade bread makes the best toast and the best breadcrumbs you’ve ever had. Nothing goes to waste. Worth doing from day one.
For more ideas along these lines, have a look at marinate chicken overnight.
The UK Angle
Here’s the UK-specific bit: what’s available, what it costs, and where I’d actually spend my money.
Strong white bread flour costs about £1.50 for 1.5kg in UK supermarkets, and one bag makes three loaves. That’s roughly 50p a loaf for bread that beats a £2 supermarket bloomer.
It’s also worth checking the NHS Eat Well guide if you want to dig deeper.
Fast-action dried yeast (the little sachets from Allinson’s or supermarket own brands) goes straight into the flour with no pre-activation needed. Much easier than fresh yeast.
What People Usually Ask
Here are the things people usually want to know once they’ve read the main guide.
Why is my bread dense and heavy?
Usually under-proving (not enough rising time) or dead yeast. Check your yeast is in date, give the dough a full rise until doubled, and make sure your kitchen isn’t too cold.
Can I use plain flour instead of bread flour?
You can, but the loaf will be denser and less chewy because plain flour has less protein. For your first loaves, stick with strong bread flour for the best chance of success.
The Short Version
If you skimmed the above, this is the part to actually read: the essentials, nothing else.
- Mix four ingredients, that’s it — Combine 500g of strong white bread flour, 7g of fast-action dried yeast (one sachet),…
- Let time do the kneading — Cover the bowl with a damp tea towel or cling film and leave it…
- Shape it simply — Tip the risen dough onto a floured surface and fold the edges into the…
- Prove for 30 to 45 minutes — Cover the shaped loaf loosely and leave it for a second, shorter rise. It’s…
- Bake hot with steam — Heat your oven to its maximum, around 240°C (220°C fan), with a baking tray…
- Cool properly before slicing — Bake for 25 to 30 minutes until deeply golden and hollow-sounding when tapped underneath.…
Wrapping It Up
Let’s pull it all together.
Great bread without a bread maker needs just flour, water, yeast, salt, and time. Mix it, leave it alone, shape it roughly, and bake it hot with steam. Your first loaf might not be perfect, but your third will be better than most of what you’d buy, at a fraction of the price.
The bottom line on homemade bread without a bread maker: it’s simpler than it looks once you break it into steps. Work through the method above at your own pace, and don’t be afraid to adapt it to your situation.
For more ideas along these lines, have a look at picnic foods that travel well.
It’s also worth checking the Food Standards Agency if you want to dig deeper.