
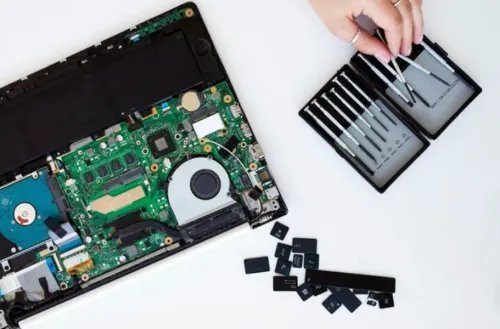
Press the power button. Nothing. Press it again, harder, as if conviction helps. Still nothing — no lights, no fan, no hopeful flicker. A dead laptop triggers a special kind of panic, because unlike a phone, it holds your work, your photos, your everything. But here’s the reassuring truth I’ve learned from reviving more “dead” laptops than I can count: when a laptop will not turn on, the problem is very often trivial — a drained battery playing dead, a stuck power state, a loose cable — and the checks below revive a remarkable number of machines that looked destined for the recycling centre. Work through them in order before you spend a penny.
Fix laptop will not turn on: start with the obvious
1. The power drain (fixes ~30% of “dead” laptops)
Laptops can get stuck in a weird low-power state where they won’t respond to the power button. The fix: unplug the charger, remove the battery if it’s removable, then hold the power button down for a full 30 seconds. This drains residual charge from the capacitors and forces a true reset. Reconnect the charger (leave the battery out for now if removable) and try powering on. I know it sounds like tech-support voodoo; I also know it works constantly. Do this first, every time.
2. Check the charger, not the laptop
Chargers die far more often than laptops do. Inspect the brick and cable for damage, check the wall socket works (plug in a lamp — seriously), and look for the charger’s indicator light. If you have access to a compatible charger, try it. USB-C laptops are convenient here — any decent USB-C PD charger will do for testing. Also check the charging port for fluff and debris; a blocked port means no power gets in, and a wooden toothpick (never metal) clears it safely.
3. Look and listen for signs of life
Plug in the charger and watch: any LED? Any fan twitch? Any beeps? Lights but no screen means the laptop has power but the display doesn’t — try an external monitor via HDMI, and shine a torch at the screen at an angle (if you can faintly see the desktop, the backlight has failed, not the laptop). Beeps in a pattern are diagnostic codes — count them and search “[manufacturer] beep codes”; they point directly at RAM, GPU, or motherboard faults. Absolutely nothing points to power delivery: charger, port, battery, or internal power circuitry.
The intermediate checks
4. Test without the battery
A completely dead battery can prevent booting on some models — the laptop tries to draw through the dead cells and fails. If the battery is removable, take it out and run on charger power alone. For sealed batteries, most laptops have a battery disconnect button (a tiny pinhole on the base — press with a paperclip for 10 seconds) that achieves the same thing. If it boots without the battery, you’ve found your culprit: a replacement battery (£30–£80 for most models) is the fix. See our battery drain guide for the replacement logic.
5. Reseat the RAM
Loose or corroded RAM is a classic cause of no-boot, especially after the laptop’s been knocked around. If your model has an accessible RAM panel (check the manual — many do): power off, unplug, remove the RAM sticks, blow out the slots, and reseat them firmly until the clips click. If there are two sticks, try booting with each one individually — a single dead stick is a £25 fix, and the laptop runs fine on the survivor while you wait for the replacement.
6. Disconnect everything
Unplug every peripheral: USB drives, dongles, external monitors, SD cards, even the mouse receiver. A shorted USB device can prevent boot, and I’ve seen a faulty USB hub hold an entire laptop hostage. Try booting completely bare — charger only.
7. The screen-is-dead-not-the-laptop test
Worth repeating because it fools everyone: connect to a TV or monitor via HDMI. If you get a picture, the laptop is fine and the screen (or its cable/backlight) is the problem — a repair-shop job (£80–£150 typically), but your data is safe and the machine is usable with an external display in the meantime.
The deeper diagnoses
8. Listen to the hard drive
If it has a spinning hard drive (increasingly rare, but still out there), put your ear to it during boot attempts. Clicking or rhythmic ticking means the drive is dying — stop trying to boot from it immediately (every attempt risks more damage) and plan data recovery via a USB caddy on another computer. If you’ve been meaning to upgrade to an SSD anyway, this is the universe’s way of insisting.
9. Try the BIOS/UEFI
If the machine shows any signs of life, hammer the BIOS key during startup (usually F2, Del, or F12 — it varies by manufacturer). If you can reach the BIOS screen, the core hardware works and the problem is Windows or the drive — a very different (and usually cheaper) fix than a hardware fault. From here you can also run built-in diagnostics: Dell, HP, and Lenovo all include hardware test suites in the BIOS.
10. Boot from USB
Create a Windows installer or Linux live USB on another computer (a friend’s, the library’s). If the laptop boots from USB, the motherboard, RAM, CPU, and screen all work — your Windows installation or internal drive is the problem, both fixable without new hardware. If it won’t boot from USB either, you’re looking at a motherboard-level fault.
When to call a professional (and when to let go)
If none of the above revives it, a repair shop’s diagnostic (£30–£50, often deducted from the repair cost) is the next step — they’ll test components individually and give you a firm quote. Apply the 50% rule: if the repair costs more than half the laptop’s current second-hand value, put the money toward a replacement instead. Our laptop lifespan guide walks through that decision properly.
One critical note: your data is probably fine. A dead laptop almost never means dead data — the drive can be removed and read via a £15 USB caddy on any other computer. Don’t let a repair shop tell you otherwise, and don’t authorise any repair that risks the drive before you’ve secured your files. If the machine is merely slow rather than dead, by the way, the fix is usually simpler — see how to speed up a slow Windows 11 laptop.
iFixit has free step-by-step repair guides with photos for thousands of laptop models — invaluable if you’re attempting the RAM reseat or battery replacement yourself, with difficulty ratings so you know what you’re getting into.
The practical takeaway
Work the sequence: 30-second power drain, check the charger and socket, look for signs of life, test without the battery, reseat the RAM, strip all peripherals, try an external monitor, attempt BIOS and USB boot. That chain identifies the problem in the large majority of cases — and the most common outcomes (stuck power state, dead charger, dead battery, loose RAM) are all cheap or free fixes. Only when every step fails is it a repair-shop or replacement decision, and even then, your data is almost certainly recoverable.