A flat tyre on a rainy B-road at 10pm is miserable — but it is also one of the most empowering fixes a driver can learn. The AA and RAC attend hundreds of thousands of tyre-related callouts a year, many from drivers perfectly capable of doing it themselves in twenty minutes. Knowing how to change a wheel saves you hours of waiting, a callout fee, and the helpless feeling of standing by the barrier. Here is the complete UK guide, including the safety steps most tutorials skip.
Before You Start: Safety Is the Whole Job
More people are hurt by unsafe jacking than by anything else in DIY car maintenance. The rules are absolute: pull as far off the road as possible — ideally a layby, car park or driveway, never the hard shoulder of a motorway if you can limp to the next exit. Switch on hazard lights, apply the handbrake firmly, switch off the engine, and put the car in gear (first or reverse; Park for automatics). Place a warning triangle 45 metres behind the car on ordinary roads — on motorways, do not walk back along the carriageway; get behind the barrier and call for help instead.
Get all passengers out and behind the barrier, away from traffic. Never work on the traffic side of the car if avoidable. And check the ground: jacks sink into soft verges and hot tarmac — use a solid board under the jack if the surface is questionable. If anything feels unsafe — fast road, poor visibility, unstable ground — skip the DIY and call breakdown cover. No tyre is worth a life. GOV.UK’s breakdown guidance sets out the official safety procedure.
What You Need (Check Your Boot Today)
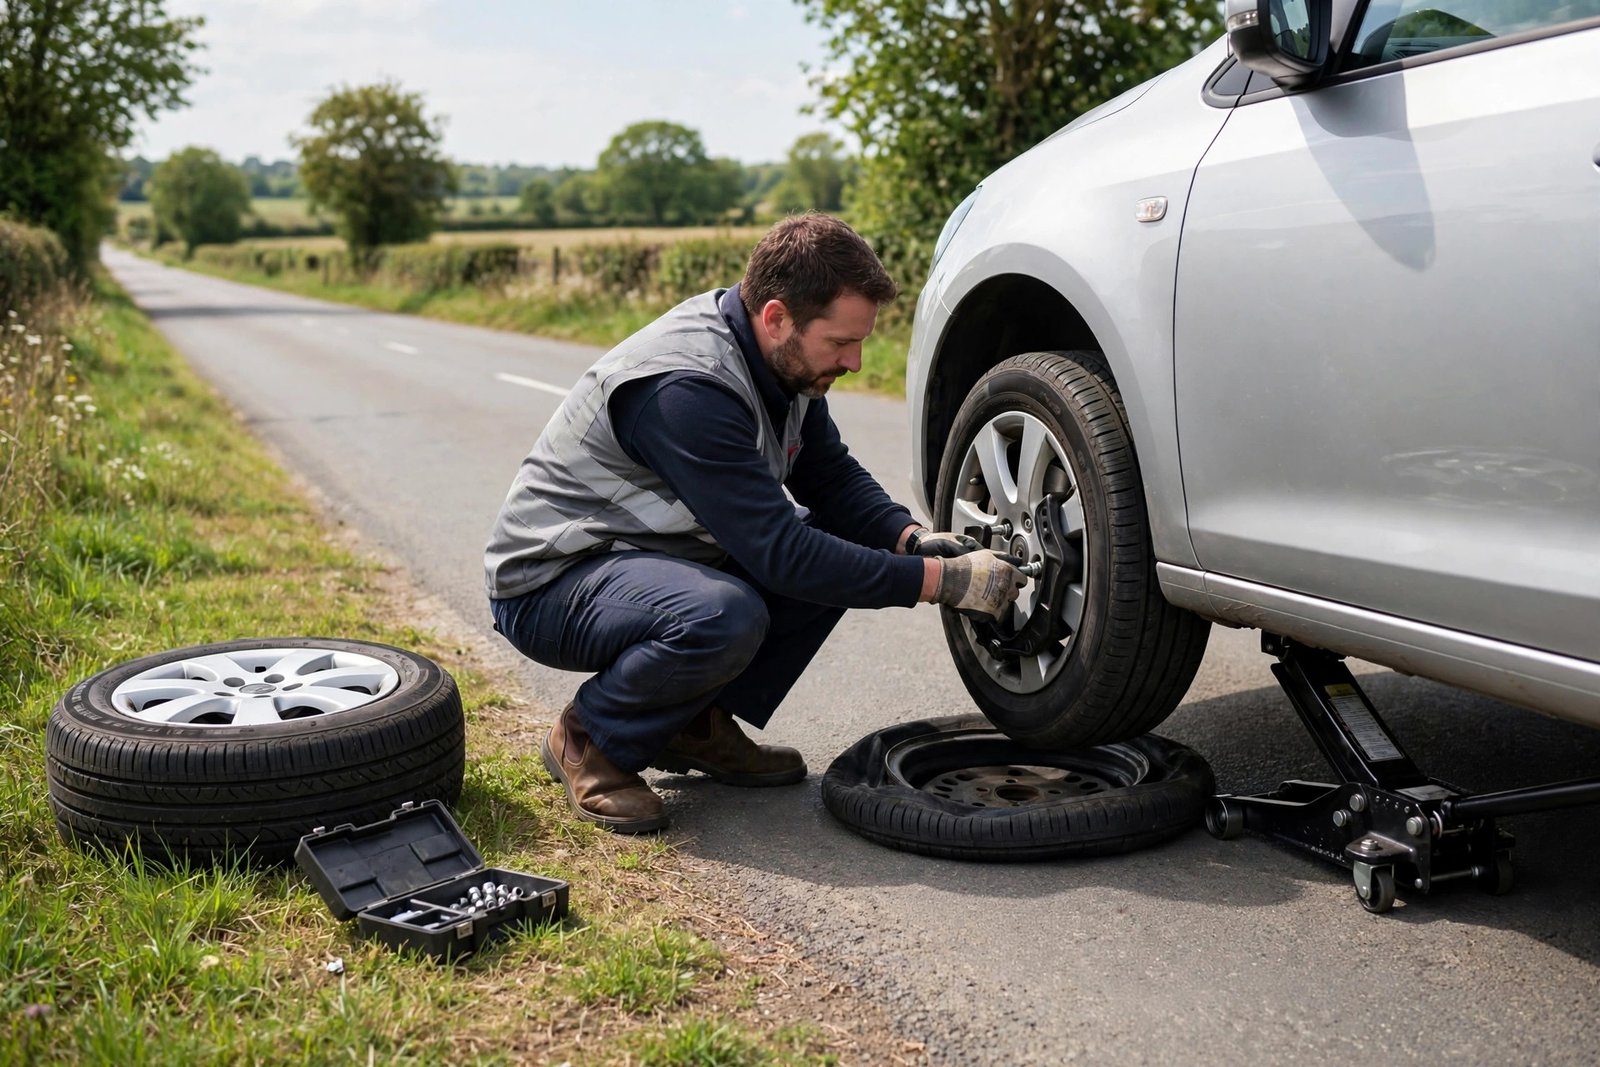
Most UK cars carry: a spare wheel (full-size, space-saver or, increasingly, nothing but a repair kit — check now, not at midnight), a scissor jack, and a wheel brace. Add to this: your car’s handbook (jack points vary), a torch, gloves, a high-vis vest, and a short plank for soft ground. If your car has locking wheel nuts, know where the locking key lives — it is the number-one reason DIY changes fail, usually discovered at the roadside in the rain.
Space-saver spares (“skinny” wheels) are limited to 50 mph and typically 50–70 miles — enough to reach a tyre shop, not to continue a journey. Cars with only a sealant kit cannot fix sidewall damage or blowouts; the kit is a get-you-home measure for simple punctures. Know which system your car has before you need it.
Step-by-Step: Changing the Wheel
1. Loosen the wheel nuts first
With the car still on the ground, remove the hubcap or trim and fit the wheel brace onto a nut. Loosen each nut by about half a turn anticlockwise — do not remove them yet. If a nut will not budge, stand on the brace carefully (keeping balance) rather than jerking it. Loosening on the ground uses the car’s weight to stop the wheel spinning.
2. Position the jack correctly
Consult the handbook for the jacking point — usually a reinforced seam behind the front wheel or ahead of the rear wheel. Positioning the jack on the wrong spot can damage the sill or, worse, slip. Raise the car until the flat tyre is just clear of the ground (a couple of centimetres — no higher than necessary).
3. Remove the wheel
Undo the nuts fully, keeping them together somewhere they cannot roll away (a hubcap makes a good tray). Grip the tyre at 9 and 3 o’clock and pull it straight toward you — wheels can be heavy and corroded onto the hub; a firm rocking motion breaks the seal. If it is truly stuck, lower the car slightly so the weight breaks the corrosion, then re-jack.
4. Fit the spare
Lift the spare onto the hub, aligning the bolt holes — this is the heaviest step; brace with your knee. Screw the nuts on finger-tight in a star pattern (opposites, not round in a circle), which seats the wheel evenly.
5. Lower and tighten
Lower the car until the tyre just touches the ground (enough to stop it spinning), then tighten the nuts firmly in the star pattern with the brace. Lower fully, remove the jack, and give each nut a final check. Stow everything — a loose jack becomes a projectile in sudden braking.
After the Change: The Critical Next Steps
Drive directly to a tyre shop or garage — a space-saver is not a solution. Have the nuts’ torque checked (most garages do this free); improperly torqued nuts can loosen. Get the punctured tyre assessed: simple tread punctures are often repairable for £20–£30, but sidewall damage means replacement (£60–£200+ depending on size). While there, ask them to check the spare’s pressure and your other tyres — flats cluster, because the nail-infested road got all four.
UK law requires minimum 1.6mm tread across the central three-quarters of the tyre — but safety organisations recommend replacing at 3mm, since wet-weather braking deteriorates sharply below that. A monthly five-minute check (tread, pressure, visible damage) prevents most roadside dramas. Correct pressures are on the driver’s door jamb sticker or handbook — not the tyre sidewall, which shows the maximum, not the recommended. For the costs of keeping a car on the road generally, it helps to understand the real costs of driving extras like airport parking and when driving beats other transport — running a car is a system of small costs, and tyres are among the most controllable.
When NOT to Change It Yourself
Call breakdown cover instead when: you are on a motorway hard shoulder or smart motorway (get out, behind the barrier, call for help — never change a wheel beside live lanes); the ground is soft, sloped or unstable; you cannot loosen the nuts safely; the car lacks a usable spare; or you feel unsafe for any reason. Breakdown providers would far rather attend a safe callout than scrape up a DIY attempt. This is also the argument for keeping breakdown cover even once you know how — the skill is for the safe situations, the cover for the rest.
Tyre Safety Resources
Beyond the monthly checks, know where to turn for help. The AA and RAC both publish free tyre-safety guides covering pressures, tread depth and winter tyres, and their patrols attend tyre-related callouts daily — breakdown cover remains worth keeping even once you can change a wheel yourself, for the situations where DIY is unsafe. A little professional backup never hurt any driver.
Conclusion
Changing a flat tyre is a twenty-minute skill with a lifetime payoff: loosen nuts on the ground, jack at the handbook point, star-pattern everything, respect the space-saver’s limits, and get the torque checked immediately after. Practise once on your driveway in daylight — the ten-minute rehearsal transforms a midnight emergency from a crisis into a chore. The drivers who cope best at the roadside are not the strongest or the most mechanical. They are the ones who checked their boot in advance.
Frequently Asked Questions
How long does it take to change a flat tyre?
About 15–25 minutes once you know the process, plus safety setup time. A first attempt on the driveway might take 30–40 minutes — which is exactly why practising in daylight is wise.
Can I drive on a space-saver spare?
Yes, but limited to 50 mph and usually 50–70 miles — it is a get-you-to-a-garage measure, not a proper wheel. Get the full-size tyre repaired or replaced the same day.
What is the minimum legal tyre tread in the UK?
1.6mm across the central three-quarters of the tread. However, braking in wet weather degrades significantly below 3mm, so most safety organisations recommend replacing tyres at 3mm.
Should I change a tyre on the motorway hard shoulder?
No — get everyone out of the car and behind the barrier and call breakdown assistance. Changing a wheel beside live traffic is extremely dangerous, especially on smart motorways.
Where is the locking wheel nut key usually kept?
Often in the glovebox, with the spare wheel tools, or in a small pouch in the boot. Check its location now — a missing locking key is the most common reason roadside wheel changes fail.