Fixing a laptop that will not turn on is mostly a matter of working a checklist in the right order, because the commonest causes are unglamorous and free to put right. Start at the top and most apparently dead machines give up their secret before any money changes hands.
A dead laptop invites panic, yet method beats panic every time, and readers wondering how long a laptop should last before it needs replacing should work the checks below before drawing any conclusion about lifespan. Fixing a laptop that will not turn on is mostly a matter of order: prove the power, read the signs, isolate the parts, and only then consider that something serious has failed. Keep notes as you go, because each result narrows the fault.
First Check: Clear the Stuck Power State Completely
Begin with the reset that revives more silent machines than any other. A laptop that ignores its power button is frequently suffering from a stuck low-power state rather than a failed component, a confusion in its power management that leaves it neither properly off nor willing to start. The remedy sounds like folklore and is in fact standard practice: disconnect the charger, remove the battery where the design allows it to come out, then keep the power button pressed for a slow count so residual charge drains away completely.
Reconnect only the charger afterwards and try the button again. Residual charge sounds too trivial to matter, yet it holds the power circuits in their muddled state, and draining it forces the machine to think from the beginning. Give the button a firm, ordinary press rather than a jab, and watch and listen carefully for any response at all, however faint, because the response, or its absence, is the first real clue the checklist produces.
If the machine wakes, let it boot fully and then shut it down properly before refitting the battery, so the clean state is not muddied. If it stays silent, nothing has been lost but a minute, and you have eliminated the commonest cause at no cost.
Second Check: Prove the Charger and Socket Are Innocent
Now prove the supply, because chargers and their cables give up long before the laptop itself does. Try a known-working wall socket rather than an extension lead of doubtful virtue, inspect the cable along its length for damage, kinks and a plug that sits loosely, and check that any light on the charger itself behaves as it should. A charger that worked yesterday can fail overnight, and a cable frayed inside its covering can pass nothing while looking innocent.
Where the machine charges over the universal serial bus standard, a substitute high-wattage adaptor borrowed from another device can settle the question in seconds, provided its output is at least as strong as the original.
Resist suspecting the expensive machine while the cheap accessories remain unproven. If a borrowed charger wakes the laptop, the diagnosis is finished and the replacement is the adaptor, not the computer. If a proven charger changes nothing, cross the supply off the list with confidence and move on, because certainty at each step is what stops a checklist becoming a muddle of guesses.
Reading the Signs of Life: Lights, Fans and Beeps
A machine that will not show a picture is not necessarily a machine that will not run, and reading its signs of life narrows the fault considerably. Indicator lights glowing, fans stirring or a drive humming all say the core is alive and the failure sits in the display chain or the startup process. Total silence with no lights at all points the other way, back towards power delivery or the main board, and that single observation divides the checklist in half.
Patterned beeps or flashing light codes are deliberate diagnostics from the manufacturer, not random distress. A repeating pattern points at memory, graphics or board faults according to a code the maker publishes, so count the beeps or flashes carefully, note the rhythm and look the pattern up on another device.
Listen closely too. A healthy fan that spins and settles, then a machine that warms slightly, suggests work is happening unseen, while repeated clicking from an older mechanical drive is a warning to stop: repeated booting attempts on a clicking drive can worsen damage to stored data.
Isolating the Battery as the Suspect
Batteries cause a quieter class of failure. A completely exhausted battery can prevent some models from starting at all, even with the charger connected, because the machine attempts to draw through the battery and finds a dead end. The test is to remove the battery where the design permits and start the laptop on charger power alone. If it wakes instantly, the battery was the fault, and the machine can live on its charger while a replacement is considered at leisure.
Sealed designs, where the battery hides inside the case, often include a pinhole battery-disconnect for exactly this test, described in the maker’s support pages for each model. A paper clip pressed gently into that pinhole, following the maker’s instructions precisely, separates the battery electrically without opening anything.
While the battery is in mind, look at it if it comes out. A battery that has swollen, lifting its casing or rocking on a flat surface, should not be refitted, charged or pressed back into place. Swelling is a safety matter rather than a repair problem, and such a battery should be handled through proper recycling channels. The background science of machine startup, set out under power-on self-test, explains why power faults halt everything so completely: the checks happen before anything else can.
Peripherals, Memory and the Bare-Machine Test
Strip the machine back to its bare self. A faulty connected accessory can block starting entirely, so unplug everything: external drives, docks, memory cards, wireless receivers and printers, leaving only the charger. Try the button on the bare machine. More than a few apparently dead laptops have been murdered by a failing accessory drawing power or confusing the startup checks, and the bare test costs nothing but the effort of pulling plugs.
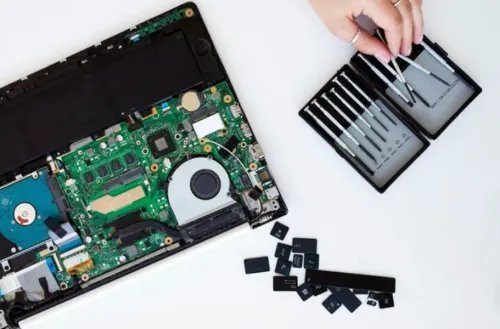
Memory is the next classic suspect. Loose or dirty memory modules are a long-standing no-start cause, particularly after a machine has been moved, knocked or upgraded. Where an access panel makes the modules reachable, reseating them, out and firmly back in until the clips engage, cures the invisible poor connection that stops a boot. Trying one module at a time then isolates a failed stick, because a machine that starts on one module and not the other has named its culprit precisely.
Respect the boundary of user-accessible panels. Machines designed to be opened by owners invite these checks; sealed machines that resist should not be forced for the sake of a checklist. Methodical habits matter here, because a lost screw or a rushed connector can turn a simple diagnosis into a second fault.
The External Screen Test That Separates Two Faults
Connect an external monitor or television with a suitable cable and try again. This single test separates two entirely different futures. If the external screen shows the familiar startup or login picture while the laptop’s own screen stays dark, the computer is fundamentally healthy and the fault lives in its display chain: the panel, its cable or its lighting. That is a repair, often a modest one, rather than a replacement, and the machine can even be used with the external screen meanwhile.
A subtler version of the same fault rewards a torch. Shine a bright light at an angle across the apparently black screen during startup and look for a faint image moving underneath. Owners regularly pronounce such machines dead when they are merely unlit, and the torch test takes twenty seconds to tell the difference.
Note which combination your machine produced: signs of life with no picture anywhere, or a picture externally only. That distinction is the most valuable sentence you can hand to a repairer, and it comes from a cable most households already own.
Firmware Screens and Booting From a Stick
If any screen lights, aim for the firmware setup screen, usually reached by tapping a particular key repeatedly during startup, with the right key named in the maker’s guidance. Reaching that screen is excellent news disguised as jargon: it proves the processor, memory and display all work, so suspicion shifts to the storage drive or the operating system. The screen’s own information, which often lists the drive it can see, tells you whether the drive is detected at all.
The next test boots the machine from an installer or recovery stick prepared on a borrowed computer. Starting happily from the stick confirms the core hardware and points firmly at the original drive or its software, while failing even from the stick suggests the board-level fault the checklist has been hoping to avoid. The system beneath these screens, described in general writing on BIOS, is the layer where such judgements get made, and you need no expertise in it beyond reaching it and reading what it reports.
Through all of this, hold onto the reassurance that matters most. A machine that will not start almost never means lost files. The internal drive can usually be removed and read from another computer with an inexpensive adaptor, so photographs, documents and work survive even the failures that end the laptop itself. Data panic makes people rush into bad decisions; let the checklist stay calm precisely because the files are, in most cases, safe.
Knowing When the Checklist Ends and a Repairer Begins
Every checklist has an honest end. If the machine shows no lights with a proven charger, stays silent after the power reset and the battery test, and offers no beeps or codes to interpret, the fault is most likely on the main board or in the power circuitry, where home diagnosis stops being sensible. Opening sealed machines beyond their user panels, or probing inside charging ports with metal tools, risks turning one fault into several and should be left to a workshop.
When you hand the machine over, hand over your notes as well: what the charger test showed, which lights appeared, whether the external screen worked and what the beep pattern was. A repairer given that history starts halfway down the checklist you already paid for in time. Ask for the diagnosis and the figure before authorising work, and weigh any quote against the machine’s age and worth to you, using your own yardstick rather than a universal rule.
Most apparently dead machines, though, never reach that door. They wake at the reset, confess to a failed charger, or reveal a dark screen hiding a living computer. Work the order, prove each layer and keep the notes, and the laptop that would not turn on becomes a problem with a name, which is most of the way to a problem solved.